Installing Petitioner is quick and easy. Just follow these simple steps to get started:
The process is pretty simple:
Download the plugin
In your WordPress dashboard, go to Plugins → Add New.
In the search bar, type “Petitioner”.
Once you see the plugin in the results, click “Install Now”.
Activate the plugin
After installation is complete, the Install Now button will change to Activate.
Click Activate to enable the plugin on your site.
Create your first petition
Once activated, you’ll see a new menu item in your WordPress sidebar called Petitioner.
Click on it and then hit “Add New Petition” to create your first petition.
There will be 4 main tabs:
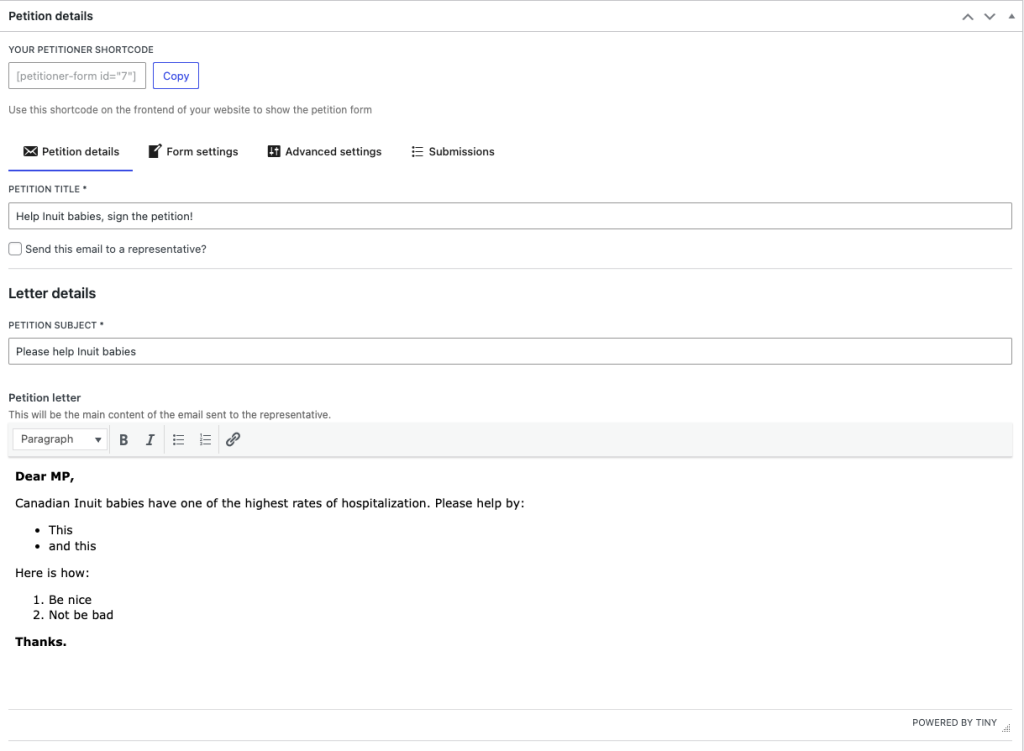
Petition details
This is where you enter all of the detail information like the title, petition letter, and whether or not you want to send this to representatives upon submission.
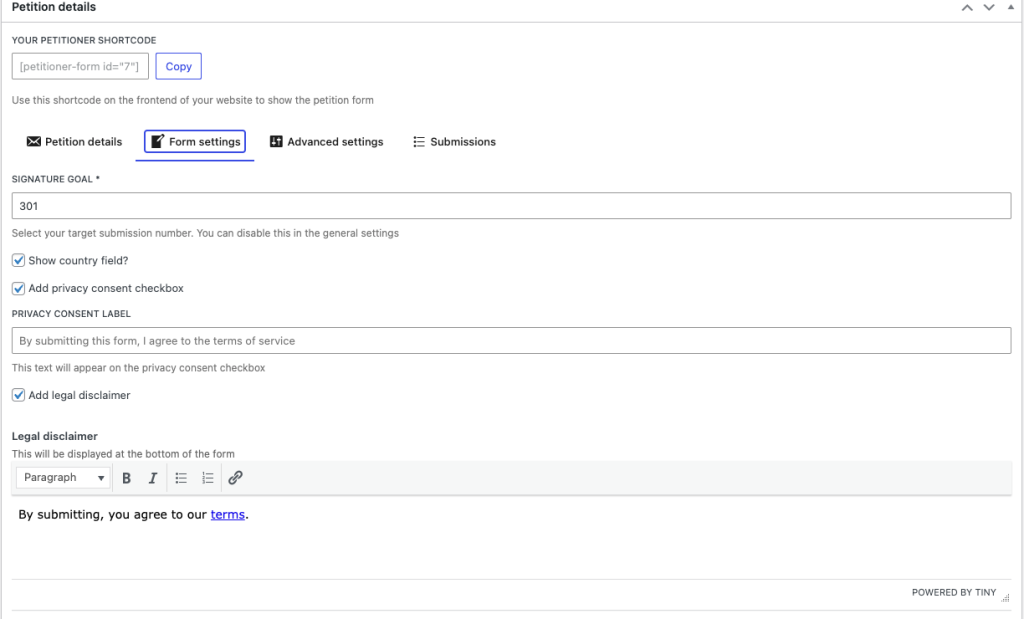
Form builder
Build and customize your form visually using drag and drop functionality, manage fields, and configure your signature goal. You can set a static goal or enable dynamic incremental milestones (e.g., automatically increasing the goal to 100, 500, and 1000 signatures as milestones are reached) to keep the momentum going.
Petitioner comes with a variety of built-in fields, but if you need something specific, you can easily register custom form fields to collect exactly the information you need.
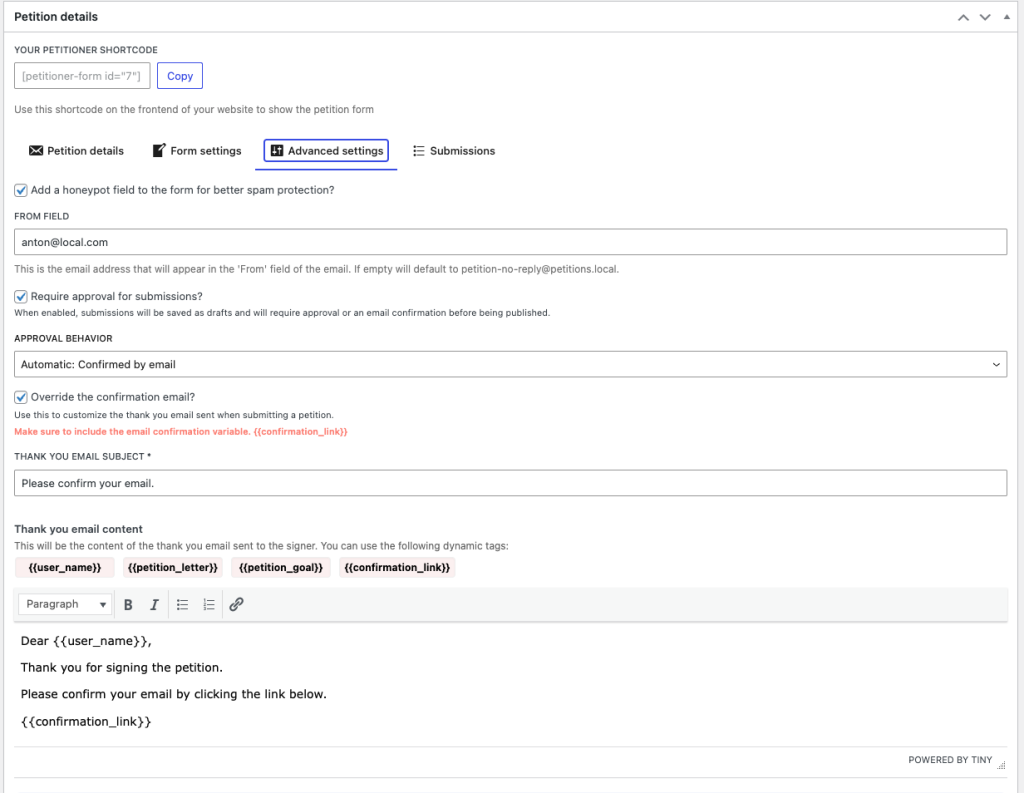
Advanced settings
This area is for more advanced settings like adding a honeypot, enabling email confirmations, or changing the confirmation behavior of the submission. You can require signers to verify their identity via email confirmations before their signature is approved, and fully customize the confirmation message they receive.
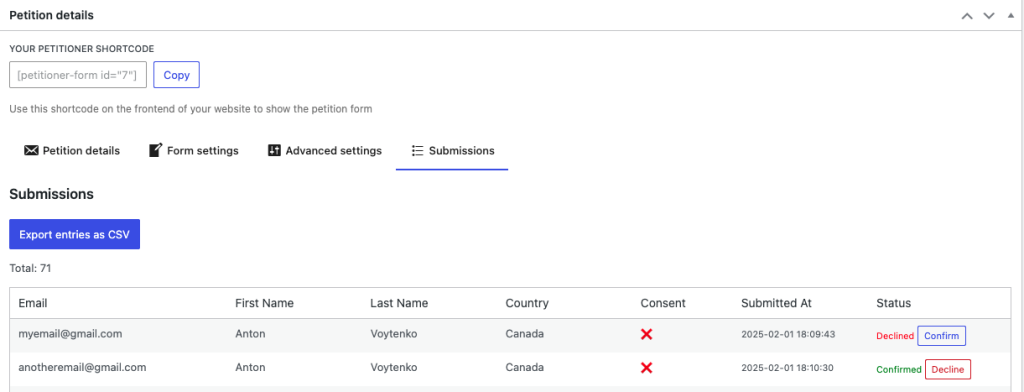
Submissions
This is where your form submissions will show up. You can view, edit, or delete individual signatures, and perform a customizable CSV export.
Embed the petition on a page or post
After publishing your petition, you can embed it anywhere on your site using the provided shortcode.
Just paste the shortcode into any WordPress page, post, or widget where you want the petition to appear. You can also use the built-in Gutenberg block!
Start collecting signatures
Once your petition is live, visitors can start signing right away.
Each signature will be stored securely and can be viewed in your Submissions tab. You can also display them on the frontend.
Customize visuals and add integrations (optional)
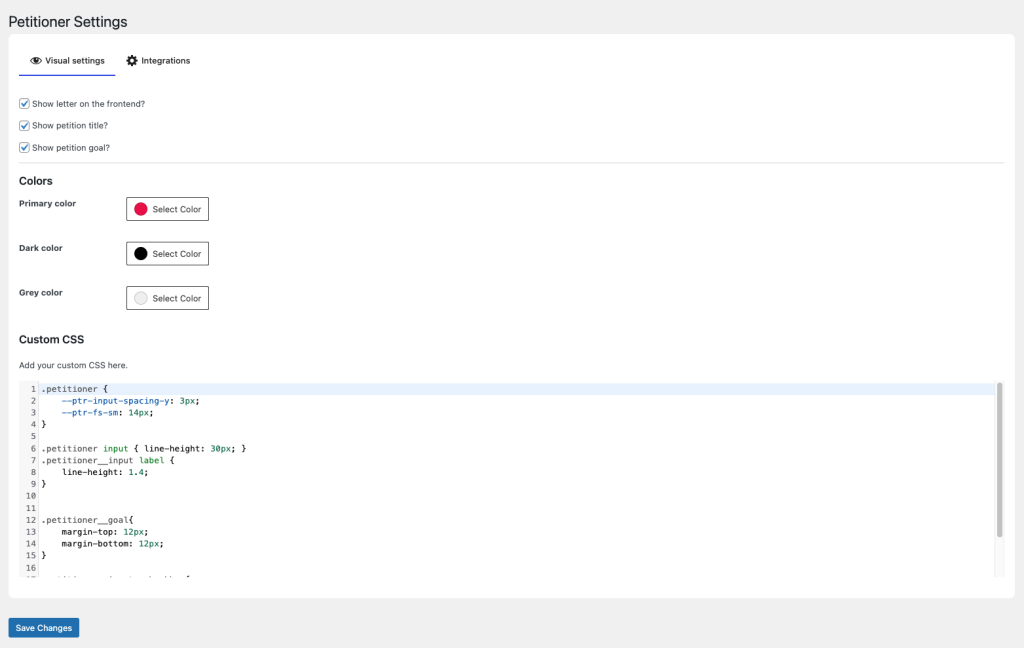
Petitioner comes with a bunch of customization options. Head over to the Petitioner → Settings area to adjust the color palette and visual elements. There will also be an Integrations tab, where you can configure powerful anti-spam features. Out of the box, Petitioner supports a built-in honeypot (enabled per form), as well as global integrations with Google reCAPTCHA, hCaptcha, Cloudflare Turnstile, and Akismet to keep your petitions spam-free. For more details on setting up CAPTCHAs, check out the CAPTCHA guide.
Next steps
Now that your first petition is up and running, here are a few things you might want to explore next:
- Shortcodes: Take the experience to the next level by placing different elements anywhere you want. Learn more about shortcodes.
- Fancy shapes: Make your petition stand out visually! Learn how to add those fancy shapes from the demo.
- Developers: Easily extend Petitioner to fit your custom needs. Check out our filters and hooks documentation for a comprehensive list of all available PHP and JavaScript hooks!